Welcome

*****Skyote #88 gets Bronze Lindy for "Airventure-Oshkosh 2016 Plans Built Champion"******


October, 2007

Welcome to "Skyotelog", the build record of Skyote #88. I assume that you are familar with the Skyote biplane. If not, you should visit http://www.skyote.org/ for a complete introduction to this unique but elusive biplane.

The posts are presented in reverse chronological order (newest first). Or you can click on one of the "Labels" to see all of the posts concerning a specific topic. Click on any photo for a larger image.

All my building experience is limited to Van's RV's so I have no experience with building tube and fabric or "plans building". I have much to learn so take everything I write with a grain of salt and reasonable skepticisim.


I do not intend to follow a "traditional" path for the construction of #88. I intend to employ low level technology and $ to reduce the construction time and difficulty where possible and practical. By low level technology I am referring to CAD, laser, waterjet, CNC. For example:

  • I have purchased a complete wing spar kit from Jerry Kerr.
  • A rib kit from Mr. Bartoe.
  • Brunton Flying Wires and Drag wires from Harvey Swack.
  • CNC profiled tube kits for the fuselage, tail feathers and landing gear from VR3.

In addition I have converted all of the wing fittings, brackets, links, lugs etc. to CAD and had them cut by water jet. I have designed a laser cut wing spar drill template/jig which positions the five spar components so that all of the holes can be drilled in a complete spar as an assembly. I plan to continue converting as many parts as I can to CAD so that I can reduce the "hand-made" components to a minimum.

Note: As of June 2015 I have over 100 CAD files which provide 600+ water jet cut parts for the Skyote.


While it takes a little time, converting the design to CAD is a great way to truly understand the drawings. plus a huge amount of information has been extracted from the rather complex drawings. This can be a great help to others in understanding and interpreting the design.


The Skyote is uniquely suited for conversion to CAD in that a "computer" was used in it's original design. I have read that Mr. Bartoe used a HP calculator to "compute" the design and dimensions of the Skyote. The plans show all of the critical dimensions to three decimal places for X,Y and Z axes.


Amazingly, when I put the design into CAD the resulting 3D models agree with Mr. Bartoe's thee decimal place dimensions about 99.9% of the time. I have found one discrepancy but less than 0.030"!


If you want to build your Skyote as cheaply as possible, or if you enjoy handcrafting the same parts over and over again then my approach to building is not for you!


If you want to build your Skyote in the minimum possible time with highly accurate parts then this approach may be the answer. I personally get a lot of satisfaction out of organizing the project so that it can be produced accurately. Hopefully some of this work will prove useful to others in the future.


Comments are welcome. I will respond as time permits

To receive email notices of new posts just enter your email address in the block at the left. It will be confidential, only Google will know!

Wednesday, October 24, 2012

Split Boot Cowl for Better Access

As shown by the photo above, the Boot Cowl side panels were originally made in one piece. The tight fit around the front landing gear/flying-wire bracing combined with the slip fit of the side panels under the top panel made removal of the side panel very difficult.

To ease installation and removal, I sheared the panels into two pieces and rejoined the halves with piano hinge.


When the retaining fasteners are removed from the side panel the hinge pin can be pulled allowing removal and installation of the panel in two easy pieces.


The hinge joiner was flush riveted and will be virtually invisible.
Access here will be important as the avionics will be located behind these panels.
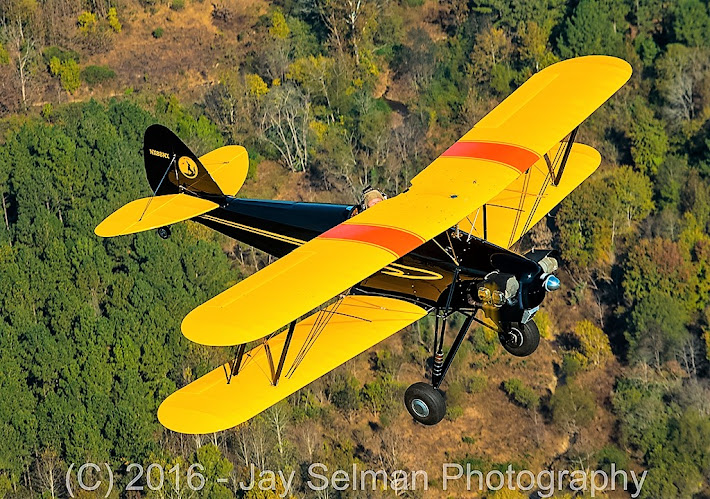


Thursday, September 13, 2012

Center Section Sheet Metal


Sometime back the center section was modified to include a handle cut from 1/4" 6061-T6 using water jet.

I decided to replace the original sheet metal tank cover with a new one which would extend back and tie into the handle.


The original plan also included access doors for each of the spar to fuselage fittings plus gap fairings to cover the space between the root rib and the center section. I decided to streamline things by using one-piece fairings to serve as access port covers as well as root gap fairings. There is a very small weight gain (again!!) but not much as the doors and the gap covers are eliminated. I still need to cut out the sheet metal in the center or open area of the handle.


Wood filler blocks were fitted and attached to the root ribs and blended to the contour of the center section around the leading edge and extending under the bottom of the wing. This will leave a very small gap at the nose of the root rib which can be covered with color matched tape. The GlaStar wing root is done this way as well as many gliders.


Here's the cut out for the grab handle in the center section.


Wednesday, August 15, 2012

Fuel Flow Transducer

I did a rerun of all the flow tests with the system installed in the airplane. I would have preferred to have the flow transducer (red cube) behind the firewall but it really likes to have as much positive head as possible. The best place turned out to be just after the gascolator. I am making up a support bracket to work off the engine mount. I had to give up my nice fire-sleeved AeroQuip fuel hose. It was just too long with the transducer added into the line. I will install fire-sleeve on the new braided line.

Tuesday, August 14, 2012

Voltage Regulator


I mounted the Plane Power voltage regulator just under the battery. I had some small vibration isolation mounts. These should not only reduce vibration but allow better air circulation behind the aluminum heat sink plate. Note the temporary nuts.
The alternator, battery, voltage regulator and starter are all within 12" to 18" of each other making for very short cables and wiring runs.

Fuel Piping

Bottom View of the Fuel Tank and Piping

Other than the down leg from the center-section tank and the flow transducer,this represents the complete fuel piping system. The two valves,which are tee'd together, allow for the selection of either tank individually, both tanks simultaneously, or all off.
Both control/shut-off valves are located on the bottom of the main tank just forward of the stick. The position of each valve is clear and visible to the pilot.

All of the piping in the cockpit is stainless braided AN-6 hose with AN-6 fittings. The valves are 3/8" ball valves.

Sunday, August 12, 2012

Trim Ring, Main Fuel Tank


I decided to make polished stainless steel trim surrounds for both fuel tank fillers.

Wooden tooling was made to give a good smooth arch to the rings so they would match the curvature of the fuel tank. The 20 ton hydraulic press gave enough squeeze to get the job done.

These will mount on top of the sheet metal boot cowl and wing tank covers to protect the paint from scratches. I was thinking about using flat head fasteners, but polished stainless button heads may look better.

FWF Fuel Piping

This is the "new style" gascolator from ACS. I chose it for its compact size and built-in drain valve. The gascolator is located so that the sump will protrude through the bottom of the cowl for easy sumping.The outlet from the carb heat shroud is longer than necessary and will be shortened to make room for the SCAT hose to clear the gascolator.


The carb heat and throttle controls worked out nicely. The aluminum bracket which mounts the carb heat control can be rotated any where from the 2:00 to 6:00 o'clock positions according to preference. I like this much better than the quadrant control system which was previously installed. The push-pull controls take up less valuable cockpit and knee room.

Fuel Flow Test


I ditched the "two compartment" tank I had previously installed in favor of this approach which uses a wedge shaped "basement section" added to the standard tank. It holds 3-1/4 additional gallons which, combined with the 12+ gallons in the main and wing tanks, should provide 2 plus hours of range with a 45 min. reserve remaining.


I set up a fuel flow rate test using all of the actual valves, hoses, fittings, gascolator, etc. as removed from the airplane.

I used NAPA parts cleaner fluid (high grade mineral spirits) in place of avgas for all the obvious safety reasons.

I performed a series of tests with varying amounts of solvent in the tank and with differing vertical dimensions between the bottom of the tank and the hose outlet to
the carb to simulate different nose-up attitudes. AN-6 hoses and fittings are used throughout. I tested with 1,2,and 3 gallons in the tank and at effective nose up attitudes of 12.5 and 20 degrees. !2.5 degrees is the three point attitude for my airplane. I timed the flow (min/gal.) for 1 gallon at each of these conditions. This time divided into 60 ( min./hr )gives the equivalent average gph flow rate for one gallon at the specific conditions tested. (whew!)

I was interested to see what effect the "red cube" fuel flow transducer would have on the flow rate. The good news is that the system will flow sufficient fuel to the carb for all conditions with the transducer included in the line.. The last remaining gallon flowed from the tank at the average rate of 16 gph at a 15 degree nose up attitude. At 20 plus degrees nose up, the flow rate was still in excess of 10 gph for the last gallon.

When I re-install the tank in the airplane, I will run the same tests with the hose hooked to the carb with the plug removed from the bottom of the float bowl. This will determine how much restriction is added by the "needle and seat" orfice.

My fuel valves are set up to allow for "either tank", "both tanks" or "all off" positions. Proper planning will have the last remaining fuel in the wing tank, eliminating concerns about low head conditions.


Balsa Fairings for landing Gear


I Used a table saw to rip some 2"x4" balsa stock down to 1"x2".

The saw was also used to rough cut the stock to the shape specified by the drawings.

The rough cut stock was taped to a piece of 1" diameter tube and sanded to shape using a sanding board and #40 grit paper

Sanded to final shape. The brake line will be concealed in the slot.

Trial fitting the fairings. The fairings will be cut to length and covered with light weight fiberglass before installation.


Monday, March 19, 2012

Cowl Reworked for O-200

Changing from the Jabiru to the O-200 required a total remake of the engine cowl and exhaust. Dale Doane has done his usual superlative job of forming a new nose bowl and air intake box. The windscreen is also complete.
My prop flange is about 2" forward of the original design position in hopes of having a more forward C.G. .

I think I will shorten the engine exhaust and the carb heat exhaust pipes a little and add a 45 degree turn back to the engine exhaust pipe.

Saturday, March 10, 2012

Windscreen Frame


I decided to take Hawkeye's advice relative to a more aft position of the windscreen. Hopefully the cockpit will be relatively quiet. The frame has internal channels to hold three pieces of 1/4 laminated safety glass. There will be a small weight penalty but I have flown behind Lexan and and safety glass before and the glass is so much better! The frame is aliminum and the trailing edge close out trim is Monel.

O-200 Cowl and intake airbox

The new cowl for the O-200 is almost complete. Still working on the inlet air box which covers the carb/carb heat diverter/air filter. The inlet is designed around a K&N filter from a big Yamaha motorcycle.


This is a view of the carb heat box which covers the junction of the left and right pipes with the vertical tail pipe. This should be a good hot spot and generate plenty of carb heat. It is also inside the cowl rather than hanging out in the breeze.
The pipes are just resting on the engine mounts in these photos and are not bolted up to the engine.
I found what appears to be a new O-200 tank. This will replace the one which has been welded around the filler neck. Tanks in good shape are really scarce.